Basic panel: exposure, contrast, highlights and shadows
What Exposure, Contrast, Highlights, Shadows, Whites and Blacks do to a RAW photo in Raw Photo Editor, their ranges, and an order of work that gets you there fast.
The Basic panel sets the light of the whole photo with six sliders: Exposure moves everything up or down in stops, Highlights and Shadows move the bright and dark areas, Whites and Blacks set the end points, and Contrast spreads the tones apart around middle grey. Most edits start here, and many finish here.
The panel is on the Basic tab of the inspector, under White Balance. Press Shift 1 to jump to it.
The controls
Canon EOS 750D · CR2 CC0, raw.pixls.us Exposure +0.55 · Contrast +25 · Highlights −55 · Shadows +40 · Whites +20 · Blacks −20
| Control | Range | What it does |
|---|---|---|
| Exposure | −5.00 to +5.00 EV | Multiplies all light. +1 doubles it, −1 halves it. |
| Contrast | −100 to +100 | S-curve around middle grey; black and white stay put. |
| Highlights | −100 to +100 | Brightens or darkens bright areas by up to about 0.9 stop. |
| Shadows | −100 to +100 | Brightens or darkens dark areas by up to about 1 stop. |
| Whites | −100 to +100 | Moves the brightest tones by up to about 0.7 stop. |
| Blacks | −100 to +100 | Moves the darkest tones by up to about 0.9 stop and shifts the black floor. |
Every slider starts at 0. Drag a slider, or click the number on its right and type a value, then press Enter; Esc puts the previous value back. With the number selected, the arrow keys nudge it by one step and Shift with an arrow by ten. A slider that differs from its default gets a small amber dot.
Double-click a slider to put it back to its default. Once anything in the section has moved, a Reset button appears in the section header and returns all six sliders to 0. Each release of a slider is one step in the history, so Ctrl Z undoes the last move.
Why a RAW file opens flat
The editor shows the RAW data as it is: no hidden contrast curve, no automatic brightening. Exposure 0 is the exposure you shot at. The only automatic correction is a DNG file’s BaselineExposure tag, which some cameras and phones write to say how much brighter the file is meant to look; it is added to the exposure without moving the slider.
That is why a fresh file usually looks darker and flatter than the camera’s JPEG, which has the maker’s own curve baked in. Nothing is wrong with the file: the Basic panel is where you add that curve yourself, to your taste.
Exposure
Exposure works in stops, on linear light, like changing the shutter speed. Set it so the midtones and the main subject look right, and don’t worry yet about the sky. Watch the histogram in the corner of the image.
Pushing Exposure doesn’t throw highlight data away. The editor computes in floating point, so tones pushed past white keep their values through the rest of the adjustments; only the final display squeezes them into range, fading them to white over about two stops instead of cutting them off. Highlights and Whites can then pull those tones back. Clipping that happens in the camera is a different matter (see below).
Highlight reconstruction
When a sensor clips, often only one or two of its color channels run out first: a bright sky near the sun, the lit edge of a cloud. Before any slider runs, the editor rebuilds the clipped channels from the ones that still hold data, using the color of the nearest highlights that didn’t clip. Areas where all three channels clipped hold no color at all and become neutral white, so a blown sun doesn’t turn orange or cyan. This happens automatically and has no control.
Highlights and Shadows
These two sliders brighten or darken regions, not individual pixels. The editor first measures the brightness of small neighbourhoods across the image and decides from that whether an area counts as a highlight or a shadow. Each pixel then gets the brightness change of its area, so the texture inside a dark forest stays intact when you lift it, and the measurement stops at strong edges, which keeps halos along a skyline small.
On the display brightness scale, Highlights starts to act on areas at 40% and is at full strength from about 95%. Shadows is at full strength in areas below 8% and fades out by 60%. The two overlap in the middle, so moving both affects midtones a little.
- Pull Highlights down (−30 to −70) to bring back sky and cloud detail after you set Exposure.
- Push Shadows up (+20 to +50) to open dark foregrounds. Large values flatten the image; add Contrast or move Blacks down afterwards to keep some depth.
- Use them in reverse for mood: Shadows down for a darker, heavier scene; Highlights up to make bright areas glow.
Whites and Blacks
Whites acts on the brightest areas, starting at 70% of display brightness. Raise it until the brightest part of the photo is just bright enough, and lower it if a bright area looks pasty. Blacks acts on areas below 30%. Lowering it darkens the deepest shadows and, near −100, pushes the darkest of them to true black. Raising it lifts them, including a small offset that lifts the floor itself, which gives a faded, matte look.
Press J while you work to see clipping: red marks pixels where any channel is at white, blue marks pixels that are black in all three channels.
Canon EOS 750D · CR2 CC0, raw.pixls.us Exposure +1.60 · Contrast +25 · Highlights −55 · Shadows +40 · Whites +20 · Blacks −20
Contrast
Contrast bends the tones into an S-curve that pivots on middle grey: tones above it get brighter, tones below get darker, and pure black and white don’t move. At +100 the curve is twice as steep around middle grey; at −100 it is half as steep. Contrast scales the three color channels together, so it changes brightness without changing hue or saturation, and it never pushes a channel past white by itself.
Because it keeps saturation as it is, a contrasty edit can look less colorful than you expect from other editors. Add Vibrance on the Detail tab if you want the colors to keep up. For contrast in one part of the tonal range only, such as the upper midtones, use the tone curve.
A working order
The order in which you move the sliders doesn’t change the result: the editor always applies white balance first, then Exposure, then Highlights, Shadows, Whites and Blacks, then Contrast. The order matters for your eyes, because each step is easier to judge once the one before it is in place.
- Set white balance first, so you judge tones in the right colors.
- Set Exposure for the midtones and the subject.
- Pull Highlights down for the sky and bright areas; push Shadows up for the dark ones.
- Set the end points with Whites and Blacks, using J to check clipping.
- Add Contrast last, then fine-tune with the tone curve if you need more control.
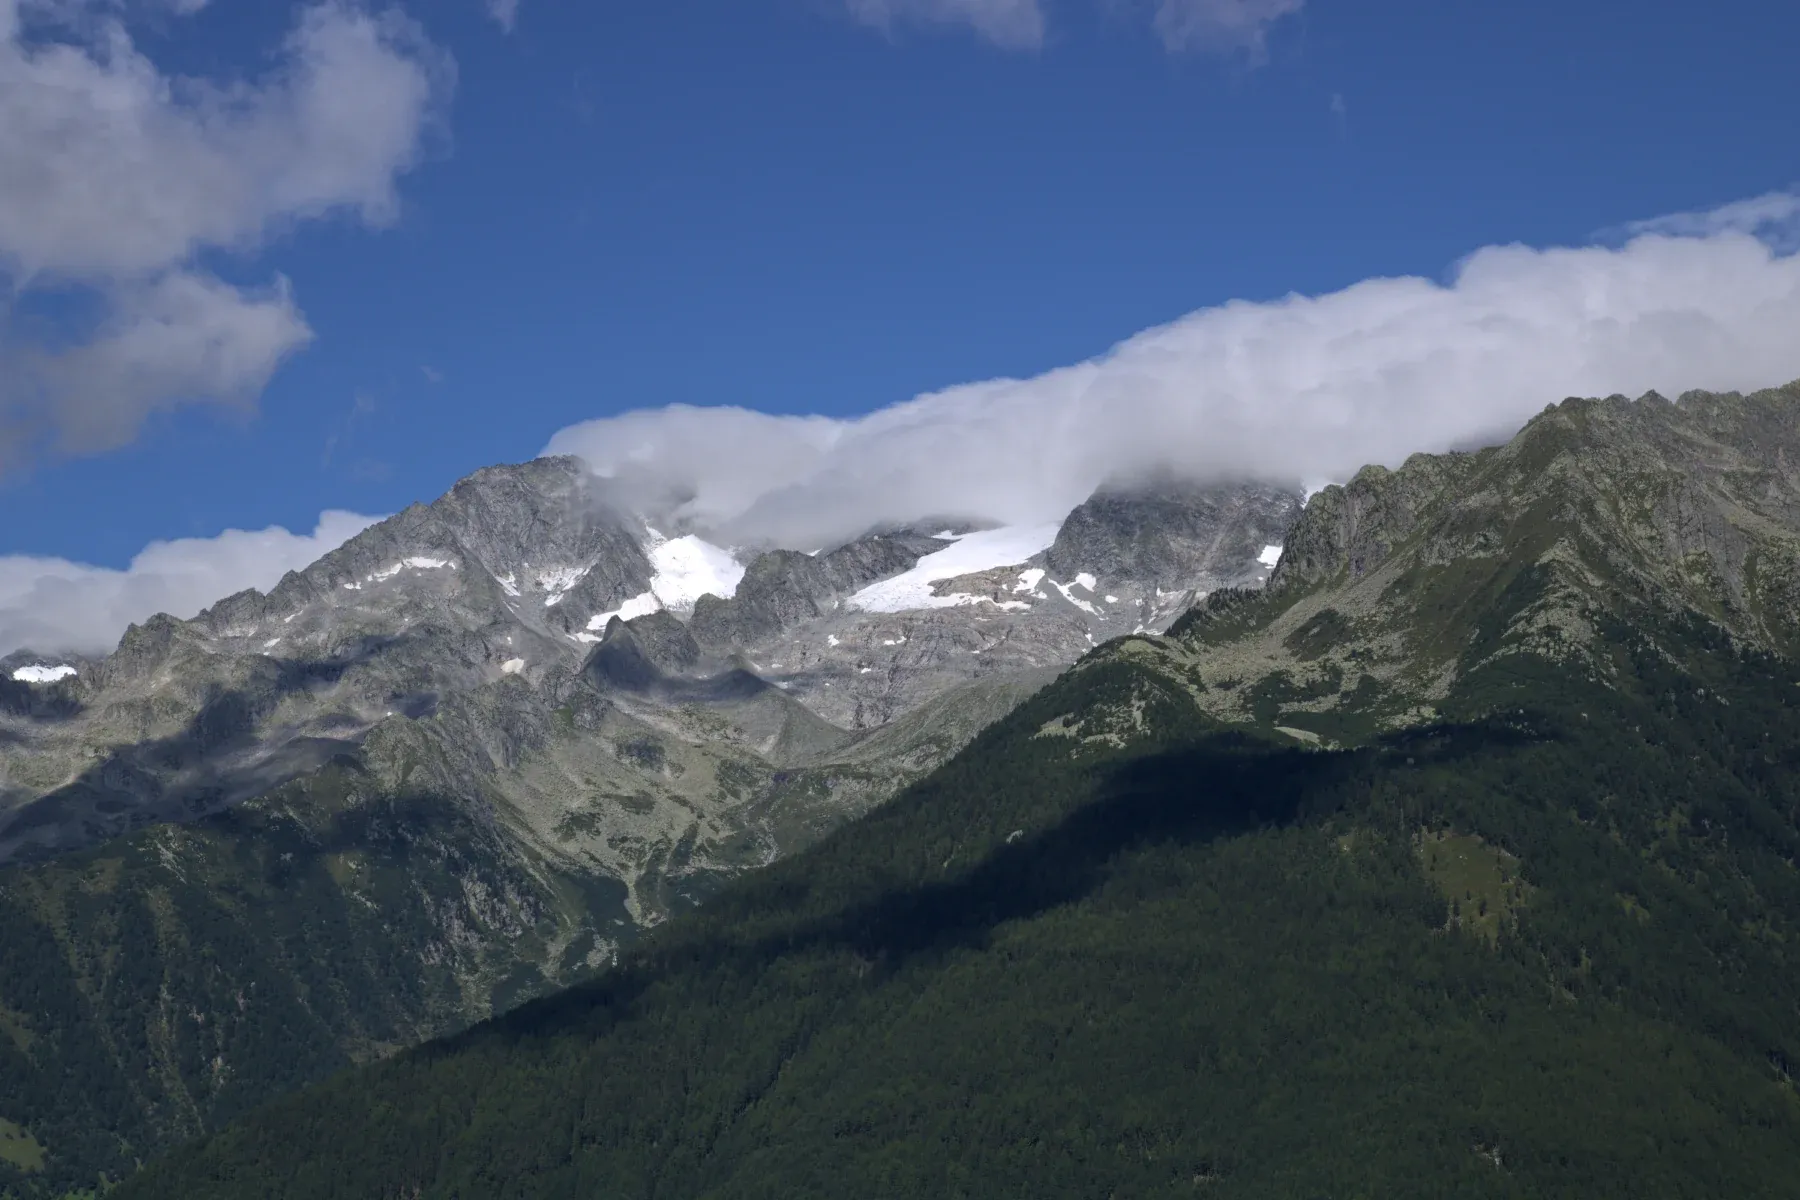
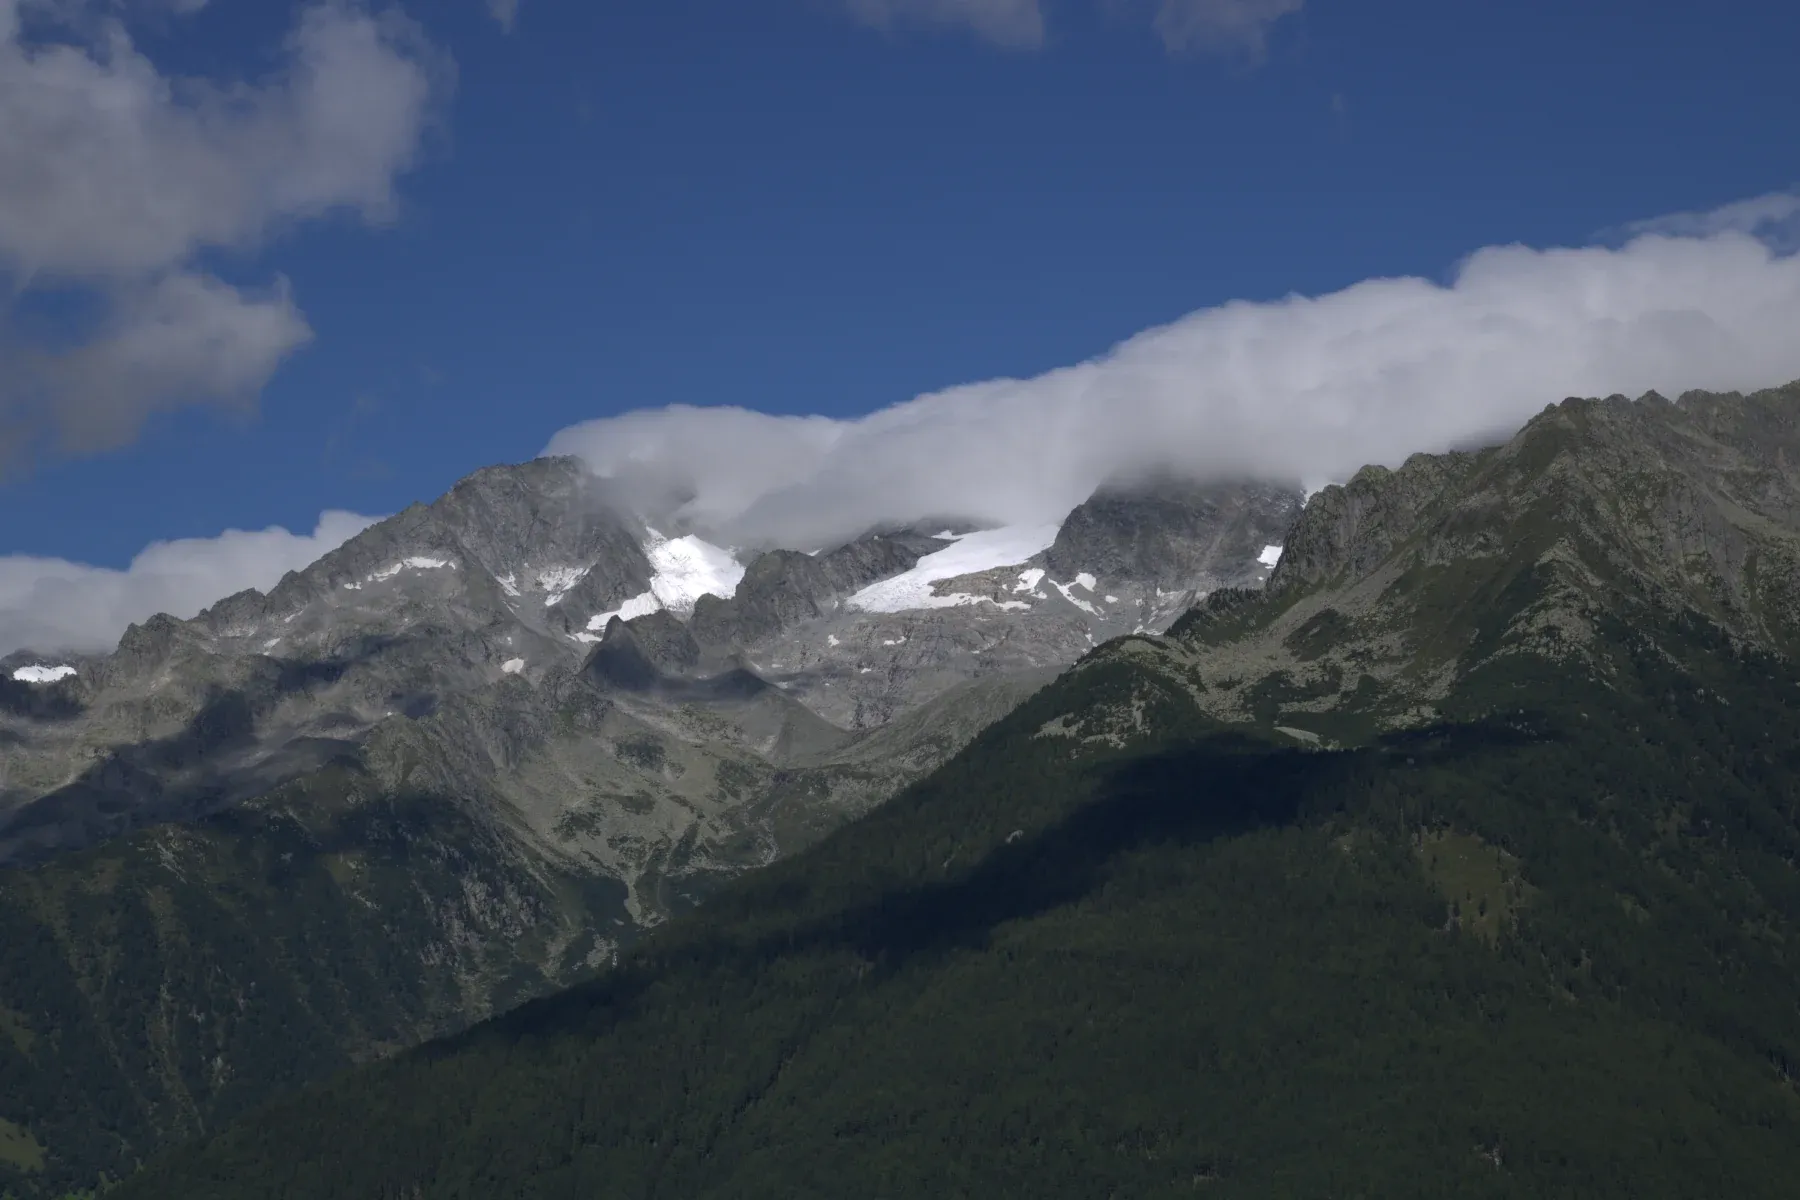
Canon EOS 750D · CR2 CC0, raw.pixls.us Exposure +0.55 · Contrast +25 · Highlights −55 · Shadows +40 · Whites +20 · Blacks −20 · Vibrance +30 · Dehaze +15 · Clarity +15
Press \ for a before/after split of your own photo, or hold B to see the original for a moment. See viewing and comparing.
Where to go next
- White balance: Temp, Tint, the picker and channel gains.
- Tone curve: shape contrast point by point.
- Masks: the same Exposure, Contrast, Highlights, Shadows, Whites and Blacks for one area.