Clarity, texture, dehaze, vignette and grain
How Texture, Clarity and Dehaze add or soften detail and cut through haze, and how to use Vignette and Grain. What each slider in the Presence panel does.
The Presence panel holds the controls that change how crisp, deep and textured a photo feels, without moving its overall brightness much. Texture works on fine detail, Clarity on larger shapes, and Dehaze removes (or adds) the veil of fog, haze or water between you and the subject. Below them, Vignette darkens or lightens the edges of the frame and Grain adds a film-like texture.
Open it with the Pres tab in the Develop column, or press Shift 6.
Canon EOS 1100D · CR2 CC0, raw.pixls.us Dehaze +70
Texture, Clarity and Dehaze
| Control | Range | What it does |
|---|---|---|
| Texture | −100 to +100 | Fine detail: bark, fabric, skin pores, foliage |
| Clarity | −100 to +100 | Local contrast at the scale of shapes: rocks, clouds, faces |
| Dehaze | −100 to +100 | Removes the haze veil (positive) or adds one (negative) |
All three start at 0. Each section has a Reset link that appears once a slider in it has moved, and double-clicking any slider puts it back to its default.
Texture
Texture compares each pixel with a small neighborhood around it and exaggerates (or flattens) the difference. It brightens and darkens luminance only, so it does not shift colors, and it applies the same way across shadows, midtones and highlights. Strong edges are held back by a soft limit, so large positive values bring out fine detail without drawing halos around high-contrast outlines.
Use positive Texture on landscapes, rock, wood and feathers. Negative values soften fine detail while leaving the broader shapes alone, which is a gentle way to smooth skin. For heavier smoothing on one area, use negative Texture or Clarity on a mask rather than on the whole photo.
Clarity
Clarity works on a larger scale than Texture: each pixel is compared with the average tone of its surrounding area (a few dozen pixels across on a 24-megapixel file). That area follows edges, so a dark tree against a bright sky is not averaged with the sky, and the boost does not halo across strong outlines.
Clarity is strongest in the bright midtones and much weaker in deep shadows, which keeps it from pulling up noise in dark areas. Positive values add depth and punch to clouds, mountains, architecture and weathered faces. Negative values give a soft, glowing look. A little goes a long way: +10 to +25 is usually enough on a whole photo.
Dehaze
Dehaze estimates how much haze lies over each part of the image and takes it away. When the file opens, the editor measures the color of the haze itself from the haziest part of the frame (usually fog, a pale sky or open water) and removes that color, rather than assuming the haze is neutral gray. That matters in mist at dawn and underwater, where the veil is tinted.
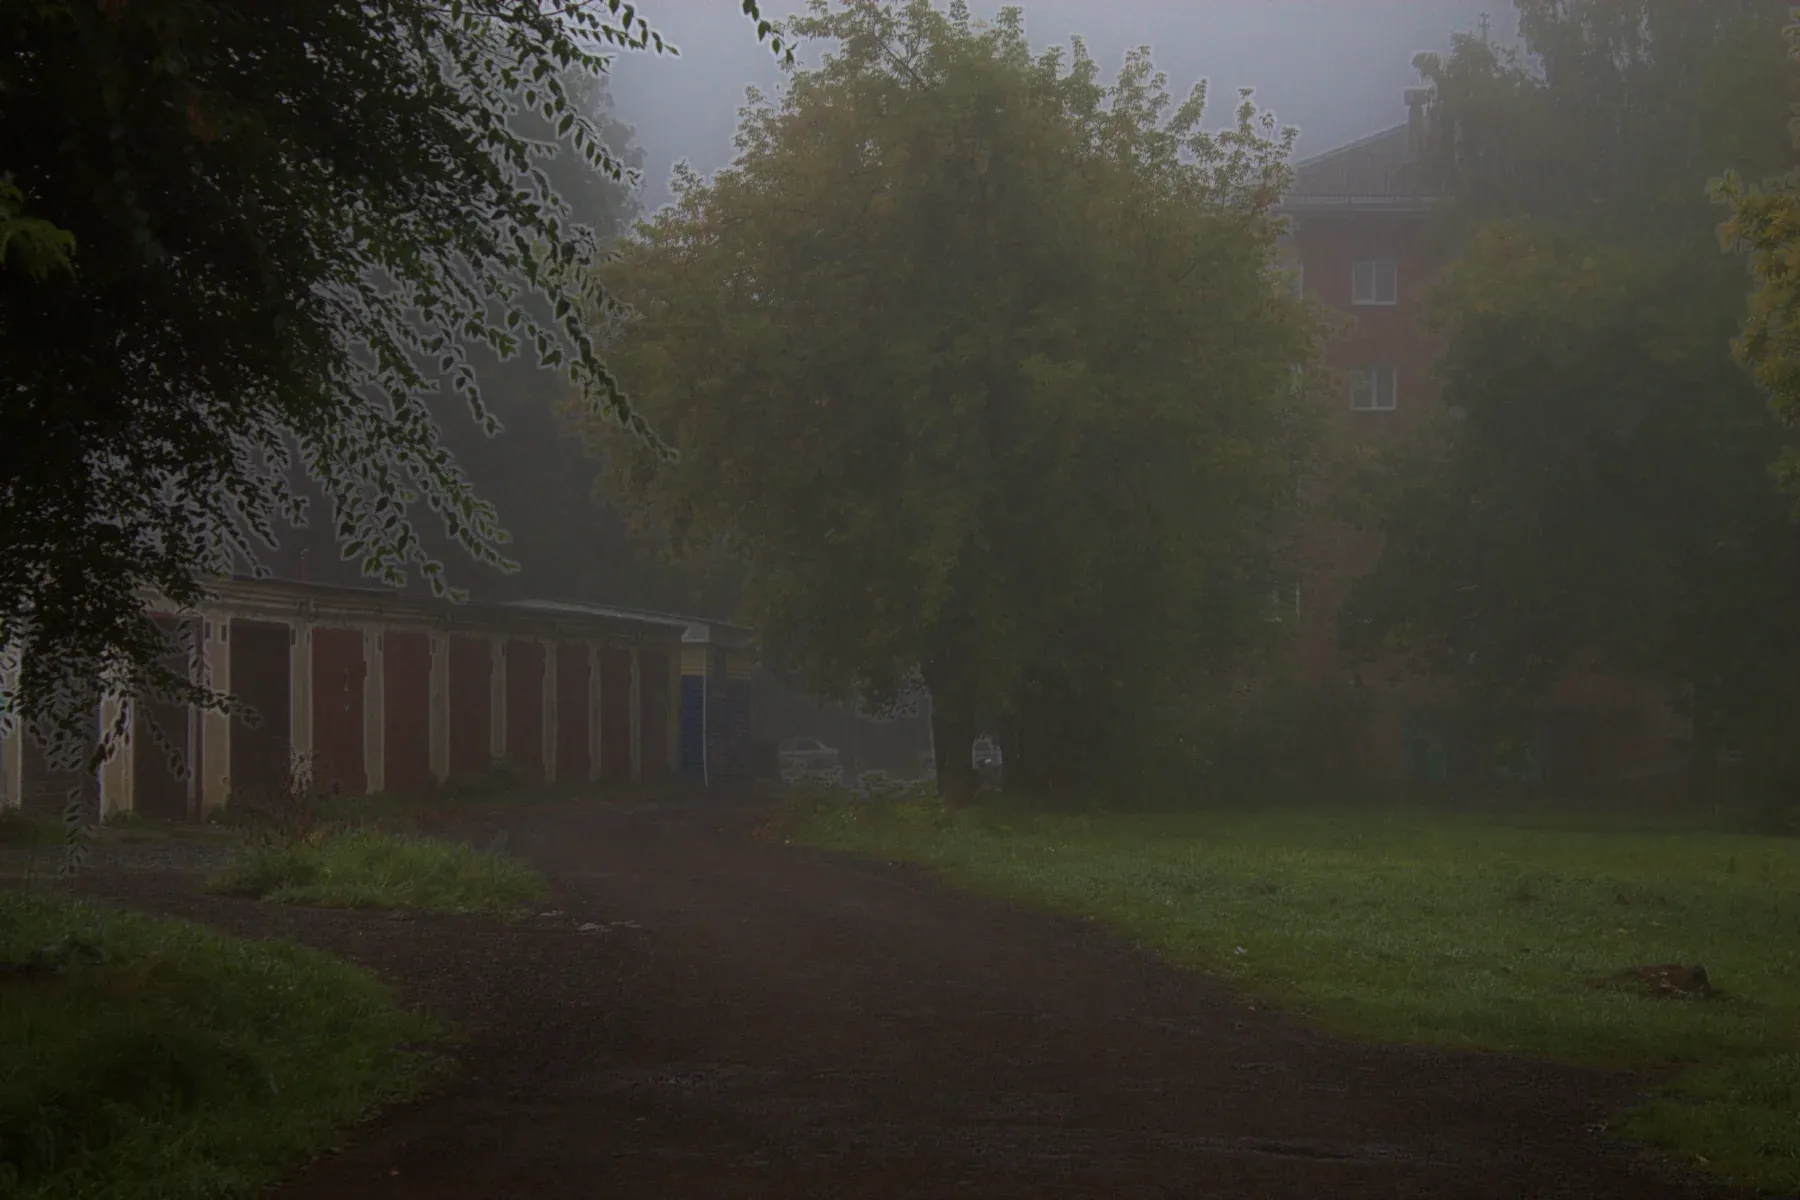
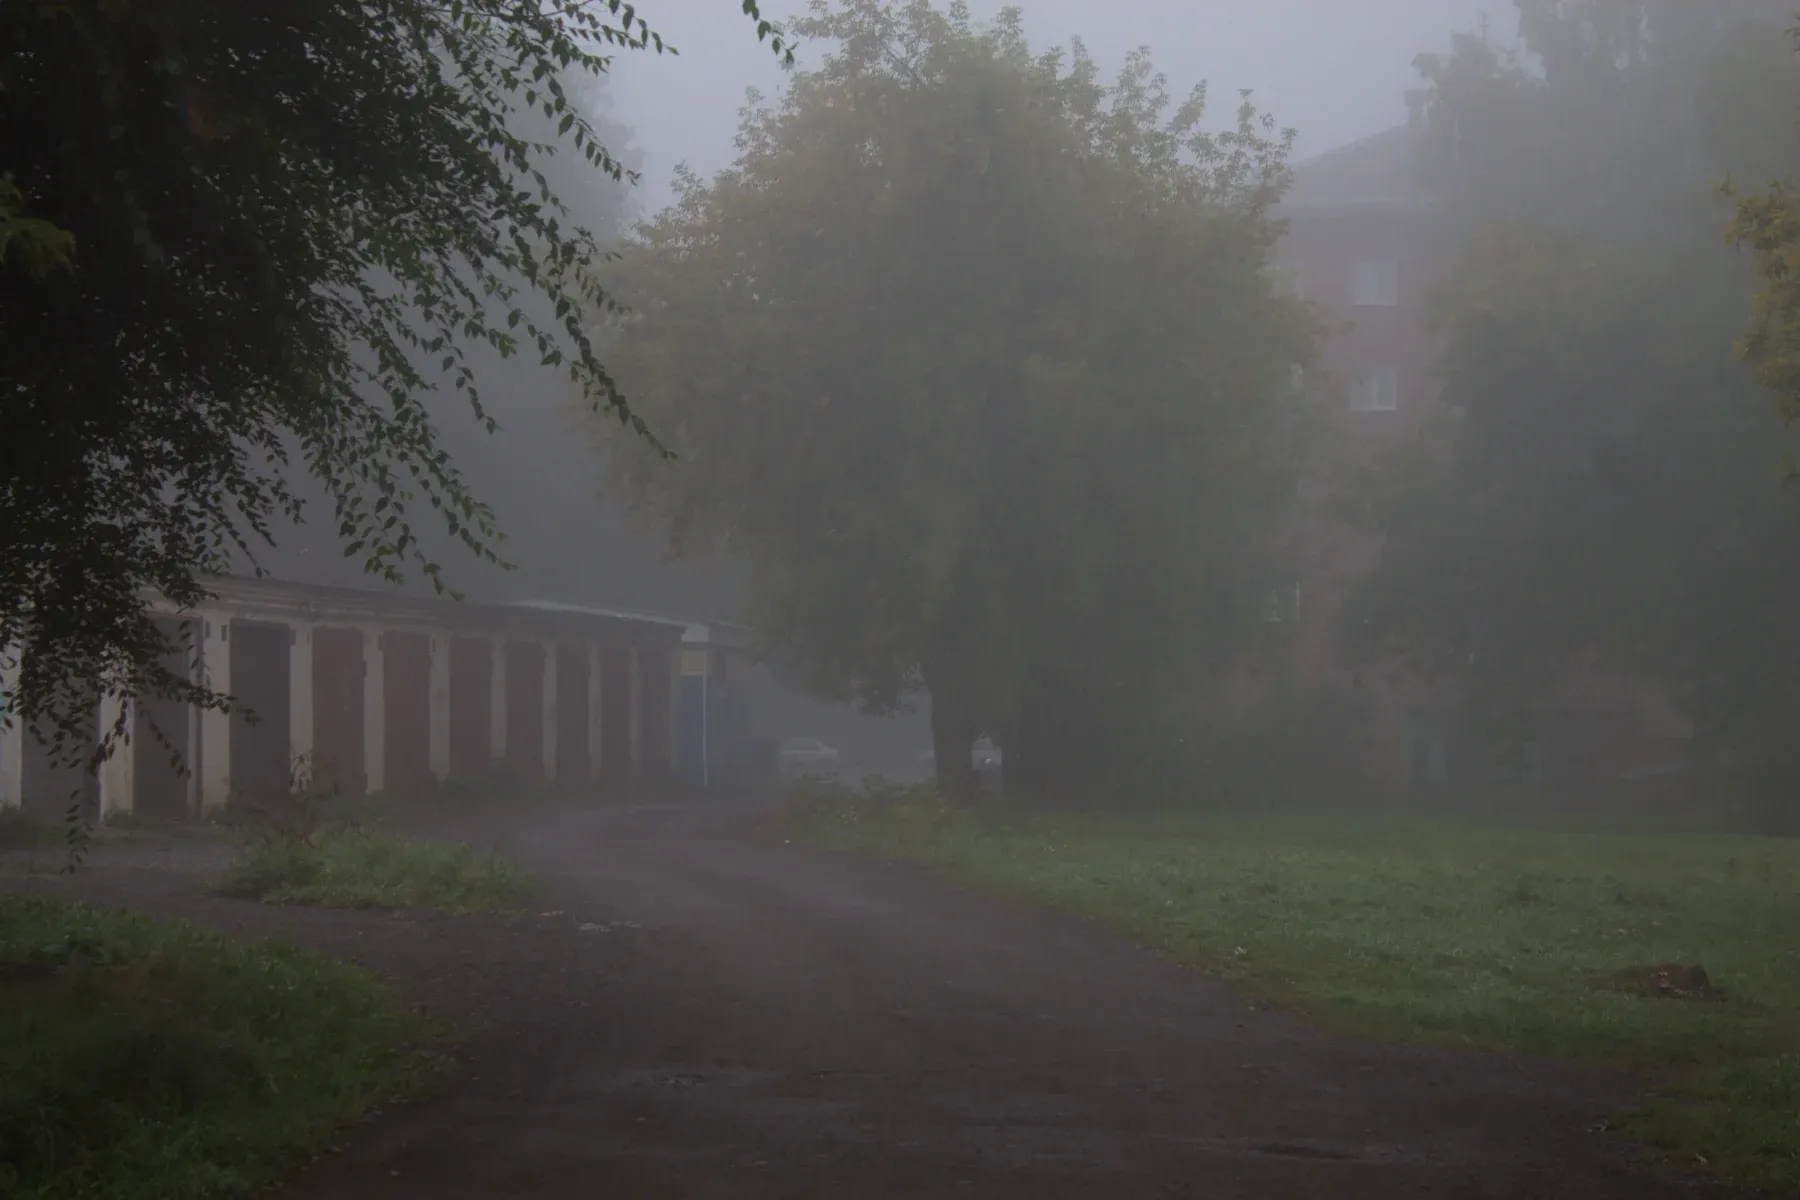
Canon EOS 1100D · CR2 CC0, raw.pixls.us Exposure +0.60 · Contrast +15 · Highlights −20 · Blacks −15 · Vibrance +20; after: Dehaze +70
Positive values recover contrast and color in distant areas and darken the open haze itself, so a white fog bank becomes a gray one. Negative values do the opposite: the veil thickens most where the scene is already hazy and only gently over nearby subjects, so −100 looks like thick fog rather than a flat gray wash.
Dehaze runs on the photo’s own colors, before White Balance and Exposure, and before Highlights, Shadows and Contrast. In practice:
- Expect the photo to get darker and more saturated. After a strong Dehaze, raise Exposure or Shadows and back off Vibrance or Saturation.
- Change white balance and exposure freely. They don’t change what Dehaze removes: warming the photo warms the cleared scene instead of leaving a colored veil over it, and the same Dehaze value means the same at any exposure.
- Use it locally for skies. If only the background is hazy, put Dehaze on a linear gradient mask instead of the whole image.
Vignette
| Control | Range | Default | What it does |
|---|---|---|---|
| Amount | −100 to +100 | 0 | Positive darkens the edges, negative lightens them |
| Midpoint | 0 to 100 | 50 | How far from the center the effect starts |
| Feather | 0 to 100 | 50 | How gradual the transition is |
The vignette is an oval that follows the proportions of the frame. Midpoint is measured from the center towards the corners: at 50 the falloff starts halfway out. Feather sets how wide the transition band is; at Midpoint 50 and Feather 50 the effect reaches full strength exactly in the corners. Lower Feather gives a harder edge, and with Midpoint plus Feather above 100 the corners only get part of the effect.
Positive Amount darkens the edges (at +100 the corners go fully black), which is the opposite sign of Lightroom’s vignette sliders. Negative Amount brightens them, up to double brightness at −100. A light darkening, +10 to +25 with Feather 60 or more, draws the eye to the center without looking like an effect.
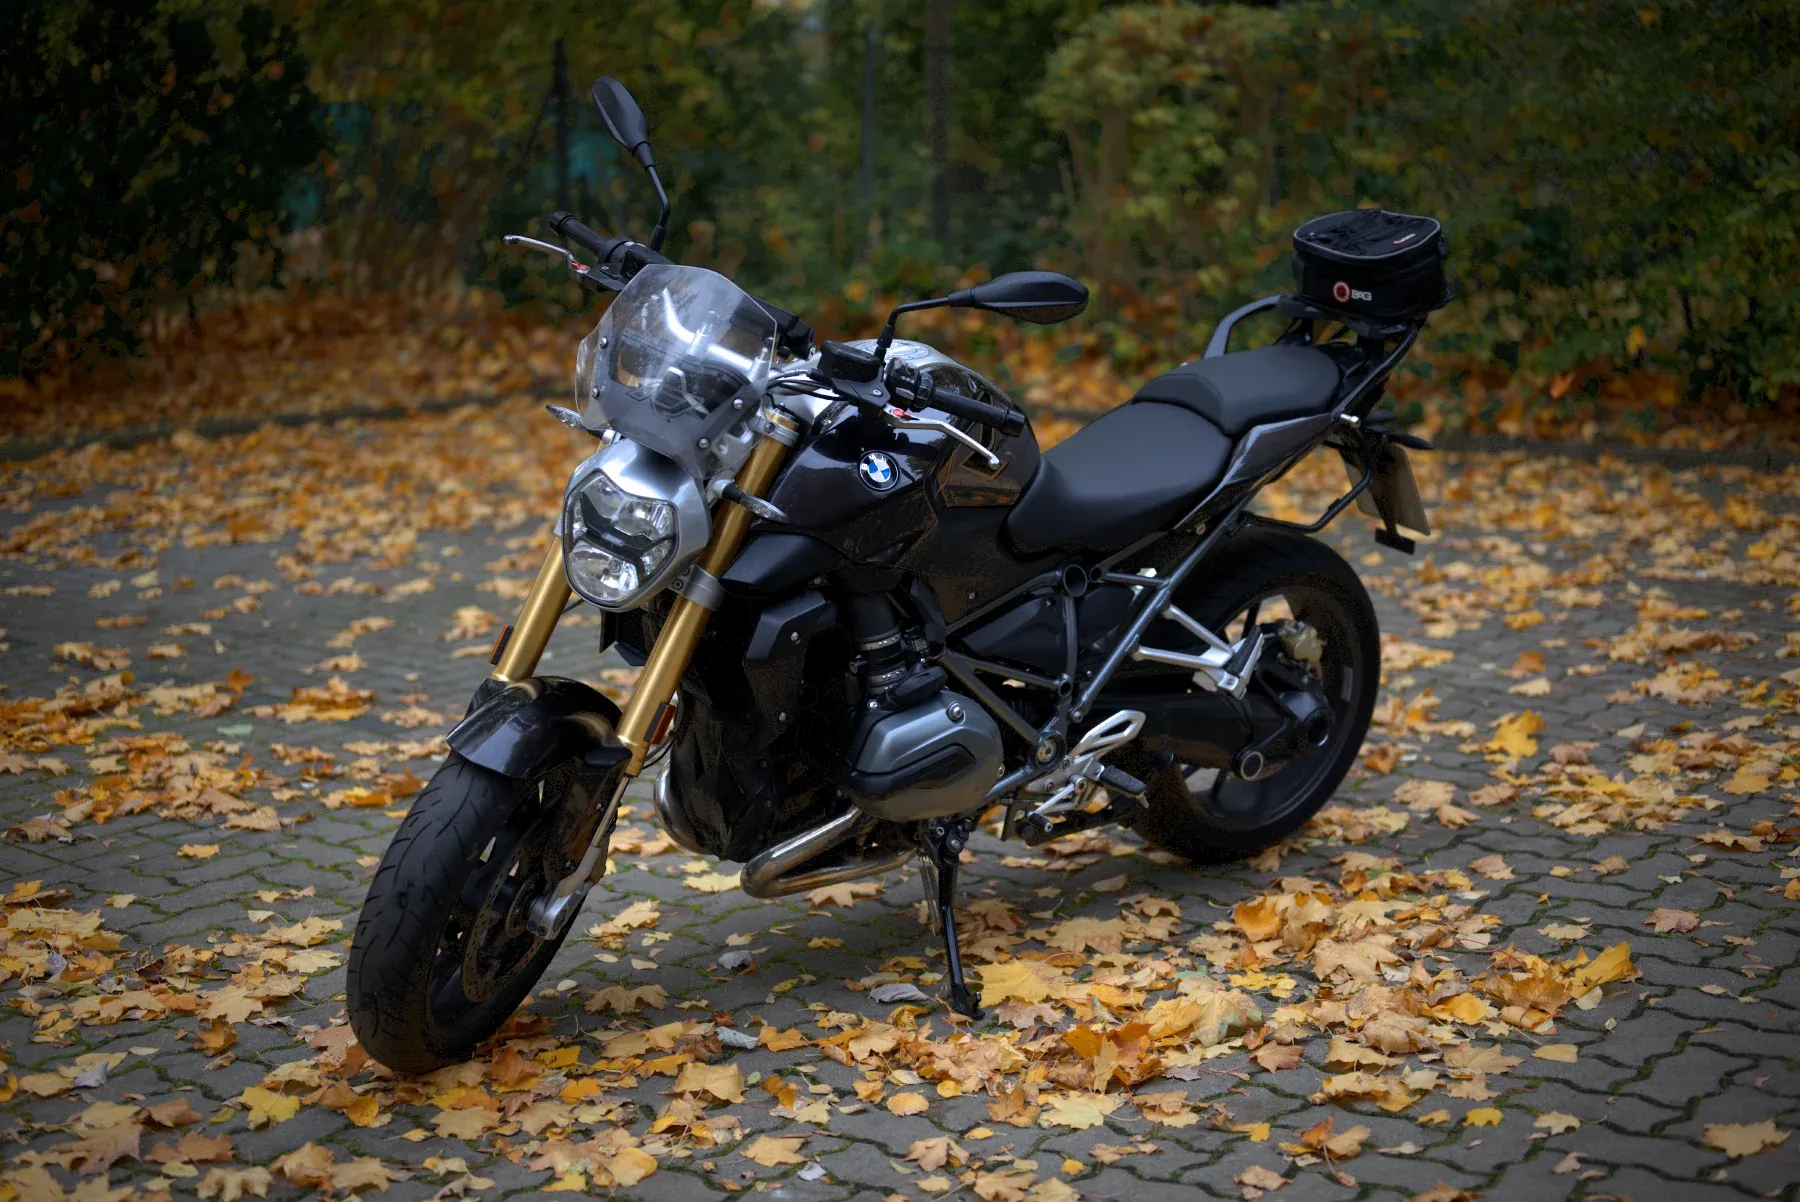
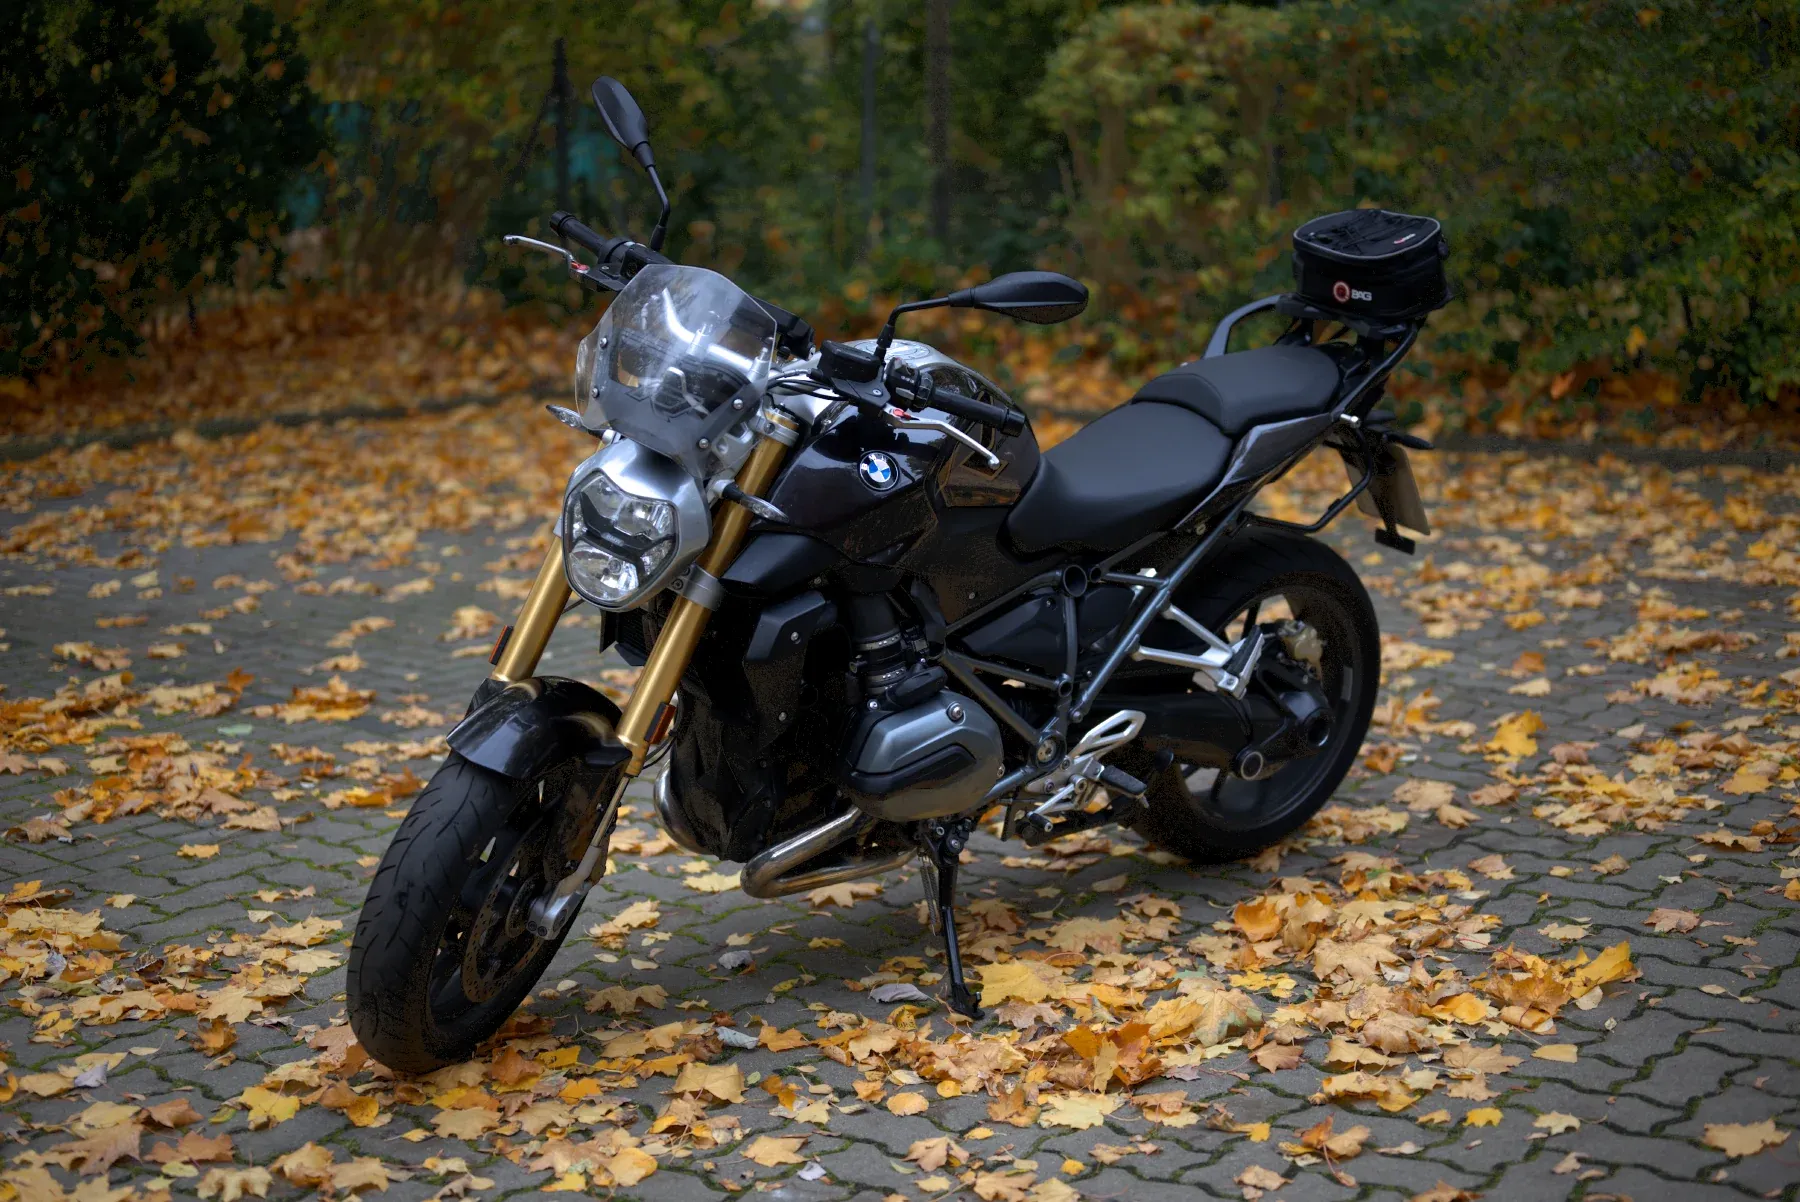
Nikon Z 5 · NEF CC0, raw.pixls.us Vignette Amount +40 · Midpoint 40 · Feather 60
Grain
| Control | Range | Default | What it does |
|---|---|---|---|
| Amount | 0 to 100 | 0 | Strength of the grain |
| Size | 0 to 100 | 50 | Size of the grain particles |
| Roughness | 0 to 100 | 50 | Adds finer, irregular grain on top of the base pattern |
Grain is monochrome: it varies brightness only, not color. It is strongest in the midtones and lighter in deep shadows and bright highlights, as in a print. It is added to the brightness as you see it rather than in linear light, so shadows don’t break up into white speckles. The pattern is fixed: the same image and settings always produce the same grain.
Grain size is relative to the image, not to your screen, so it looks the same at Fit and in the exported file. At Size 50 a grain particle is about three pixels across on a 24-megapixel file. Roughness adds a second, finer layer of grain above 20 and a third above 50, which breaks up the regular look of smooth grain.
Grain is the last global step, after sharpening and noise reduction, so it is not smoothed away by them. Add it to black-and-white conversions, to hide banding in smooth skies, or to make a heavily noise-reduced image look less plastic.


Canon EOS 750D · CR2 CC0, raw.pixls.us Grain Amount 40 · Size 50 · Roughness 50 · 1:1 crop
Related pages
- Detail: sharpening, noise reduction, vibrance and saturation.
- Masks: local Clarity and Dehaze on part of the image.
- Crop and rotate: framing, and why to crop before you set the vignette.
- Try it in the editor.