Masks: edit part of a RAW photo
Use linear, radial, brush, luminosity and color range masks to adjust part of a RAW photo, such as a sky, a subject or a background, with 12 local sliders.
A mask limits an adjustment to part of the image. You add a mask in the Mask tab, shape it on the photo or with sliders, and then move its Local Adjustments sliders: they act only where the mask is, and fade out where the mask is soft. Use masks to darken a sky, lift a face, or quiet a busy background without touching the rest of the frame.
There are five kinds of mask: two gradients you place by hand, a brush you paint with, and two range masks that select by brightness or by color.
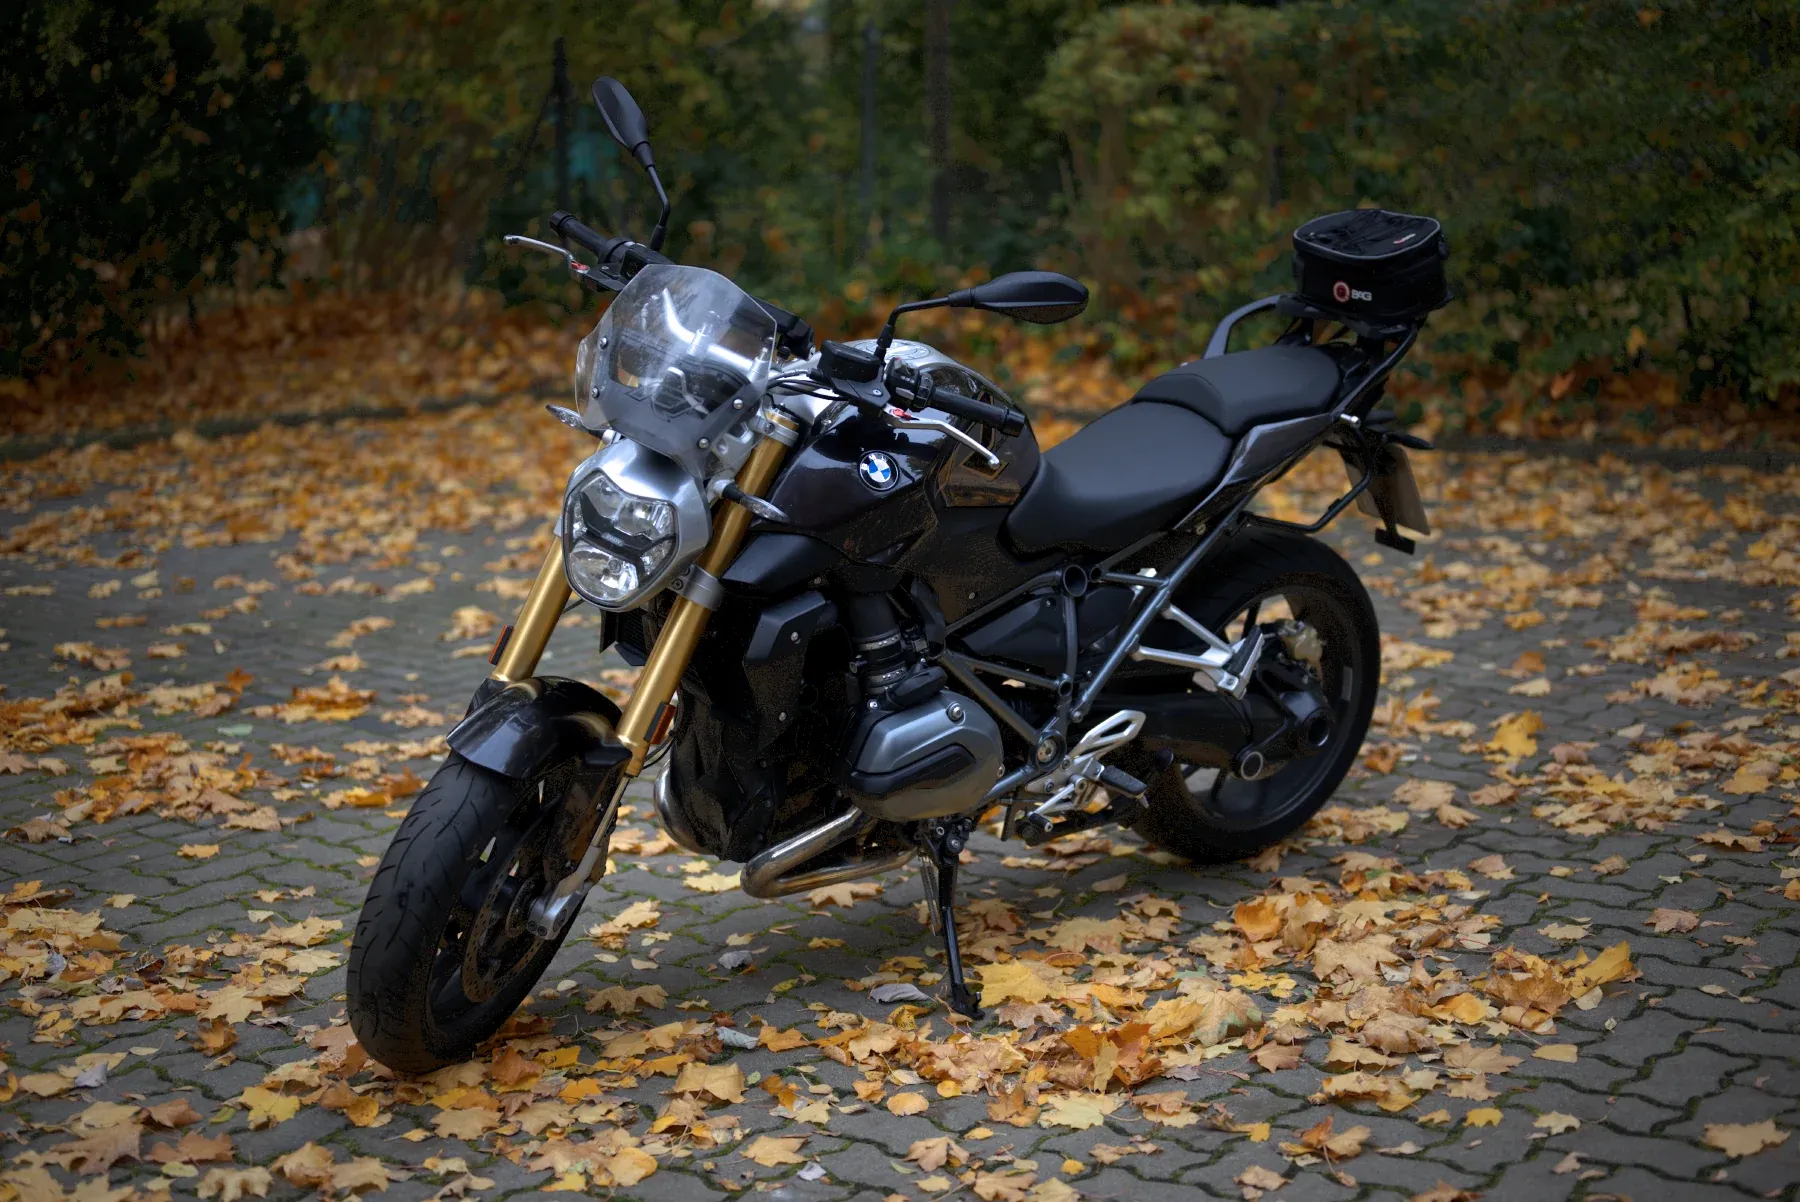
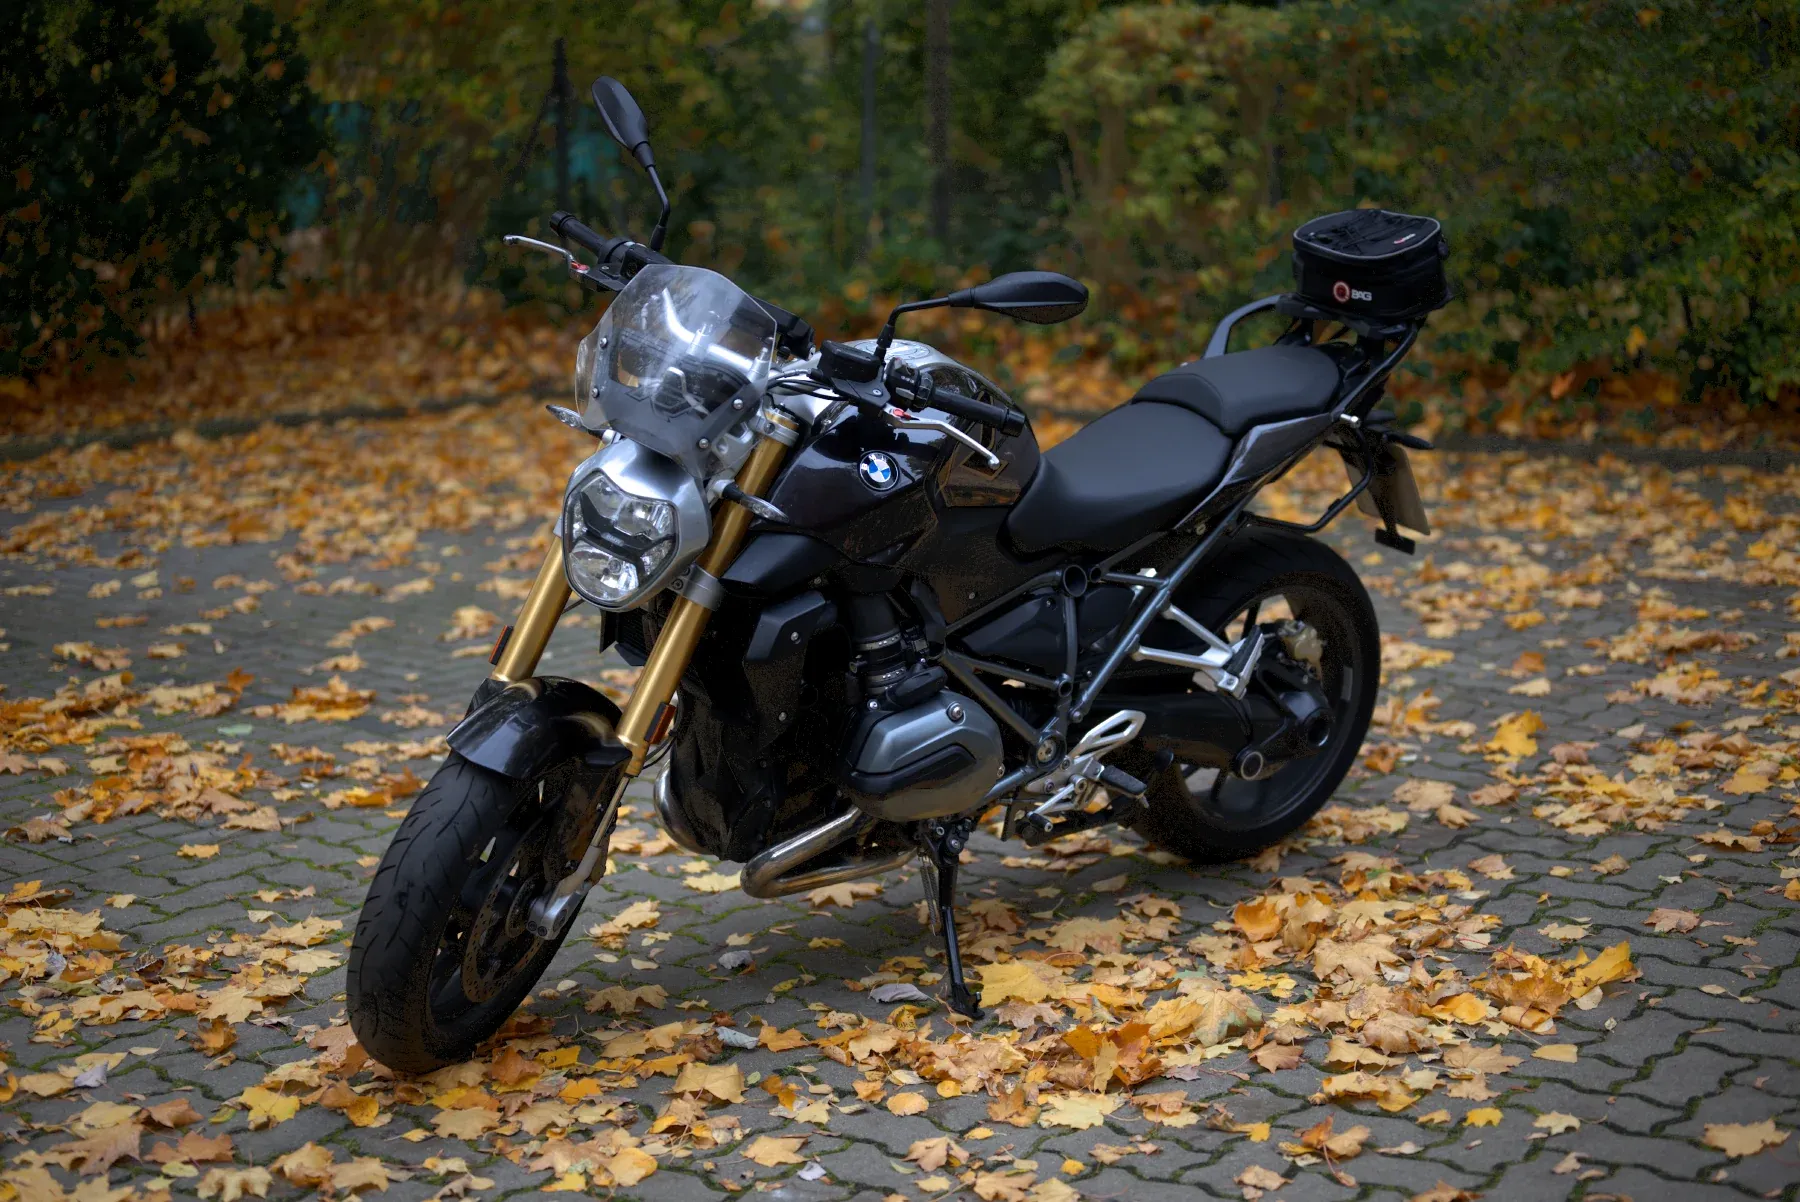
Nikon Z 5 · NEF CC0, raw.pixls.us Inverted radial: Exposure −0.45 · Saturation −10 · Radial on the bike: Clarity +20 · Shadows +20
Add and manage masks
Open the Mask tab in the Develop column, or press M. Under Add Mask there are five buttons:
- / linear gradient
- O radial gradient
- L luminosity range
- C color range
- B brush
Each click adds a new mask to the list and selects it. A mask is named after its type, and the line below the name repeats the type. Click a mask in the list to select it; click it again to deselect it. The sliders and on-image handles always belong to the selected mask.
Nikon Z 5 · NEF CC0, raw.pixls.us
Each row in the list has three buttons:
- Inv inverts the mask: the adjustment applies everywhere except where the mask is. An inverted radial is the usual way to darken or desaturate the surroundings of a subject.
- On / Off switches the mask without deleting it, so you can check what it contributes.
- × deletes the mask.
Masks are applied in list order, each on top of the result of the ones before. Every change, from adding a mask to moving a handle, is a step in history, so Ctrl Z undoes it.
See the mask with the overlay
Click Overlay at the top of the panel, or press O, to tint the selected mask in red. Full red means full strength; no tint means the area is untouched. The overlay shows the mask’s shape even before you have moved any slider, so turn it on while you place a mask and off while you judge the result.
While the overlay is on, Overlay Color and Opacity appear under the panel header. Red is the default; pick green, yellow or white when the subject is red, orange or skin, or when the red clipping indicator is on as well. Opacity runs from 10 to 100 (default 50). The editor remembers both.
The local sliders
The Local Adjustments section has 12 sliders. All start at 0, and a mask whose sliders are all at 0 has no effect. Reset at the top of the section sets them all back to 0; double-click a single slider to reset it.
| Control | Range | What it does |
|---|---|---|
| Exposure | −5 to +5 EV | Brightens or darkens the masked area, in stops |
| Contrast | −100 to +100 | Steepens or flattens the tones around the midtones |
| Highlights, Shadows | −100 to +100 | Recover or open the bright and dark tones of the area |
| Whites, Blacks | −100 to +100 | Move the brightest and darkest tones of the area |
| Temp, Tint | −100 to +100 | Warm or cool, green or magenta shift |
| Clarity | −100 to +100 | Local contrast in the midtones |
| Dehaze | −100 to +100 | Lifts contrast in the darker tones of the area, where haze shows most |
| Saturation | −100 to +100 | More or less color; −100 is black and white |
| Sharpness | 0 to 150 | Extra fine sharpening inside the mask |
Highlights, Shadows, Whites and Blacks judge the tone of the surrounding area rather than of each pixel, as their Basic panel counterparts do, so strong local settings keep the detail. A local +50 behaves like a global +50 inside the mask.
Local Temp and Tint are useful for mixed light: warm a face lit by a cool window, or cool a shadow that picked up the color of a warm wall. Small values go a long way.
Gradients
Linear gradient
Nikon D1X · NEF CC0, raw.pixls.us Sky: Exposure −0.45 · Highlights −35 · Dehaze +20 · Saturation +15
A new linear gradient appears in the middle of the image with two handles, Start and End. Drag them into place. The mask is at full strength at Start and beyond it, fades smoothly to nothing at End, and has no effect past End. The line between the handles sets the direction, so you can tilt the gradient for a sloping horizon.
Put the handles far apart for a soft transition, close together for a hard one. A gradient doesn’t follow edges: a mountain that rises into the sky gets the same treatment as the sky beside it. If that shows, add a brush mask with the opposite adjustment, or use a color range mask instead.
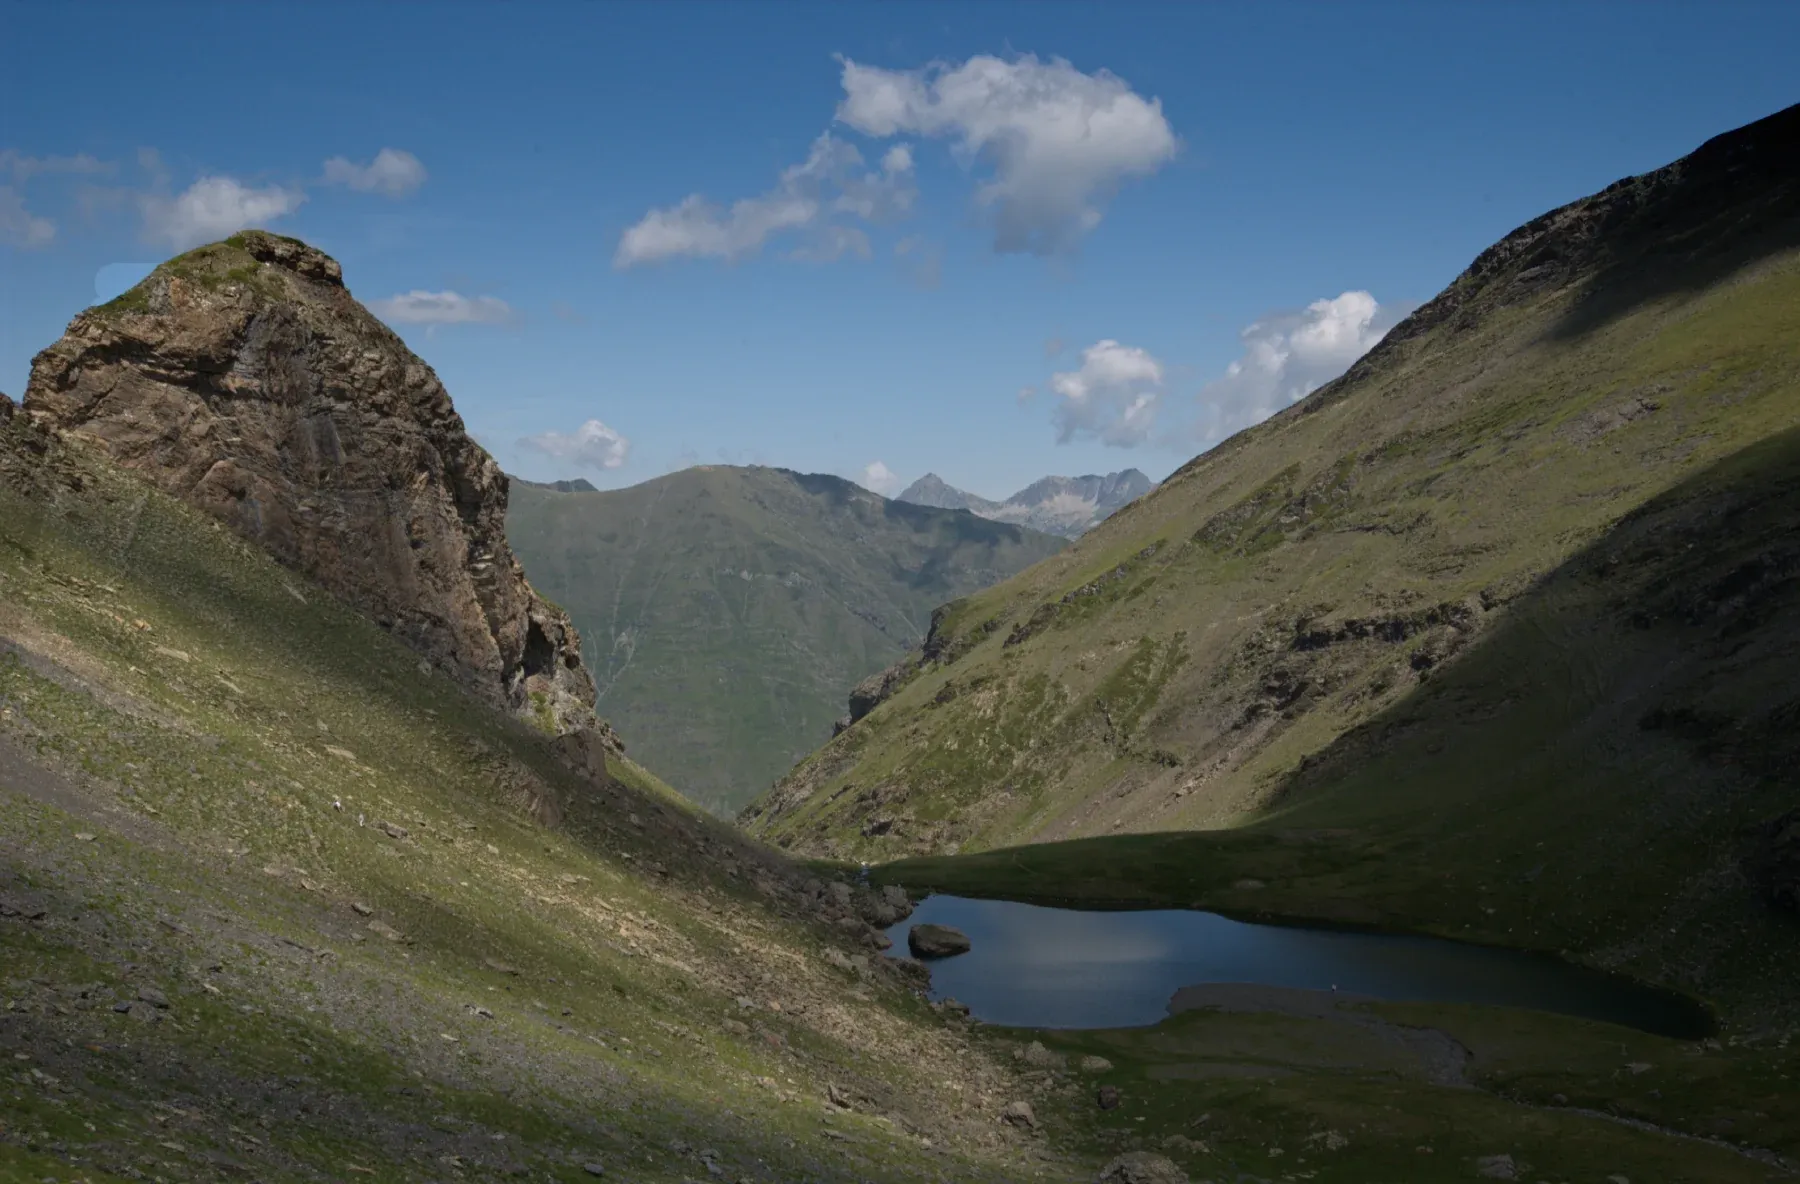
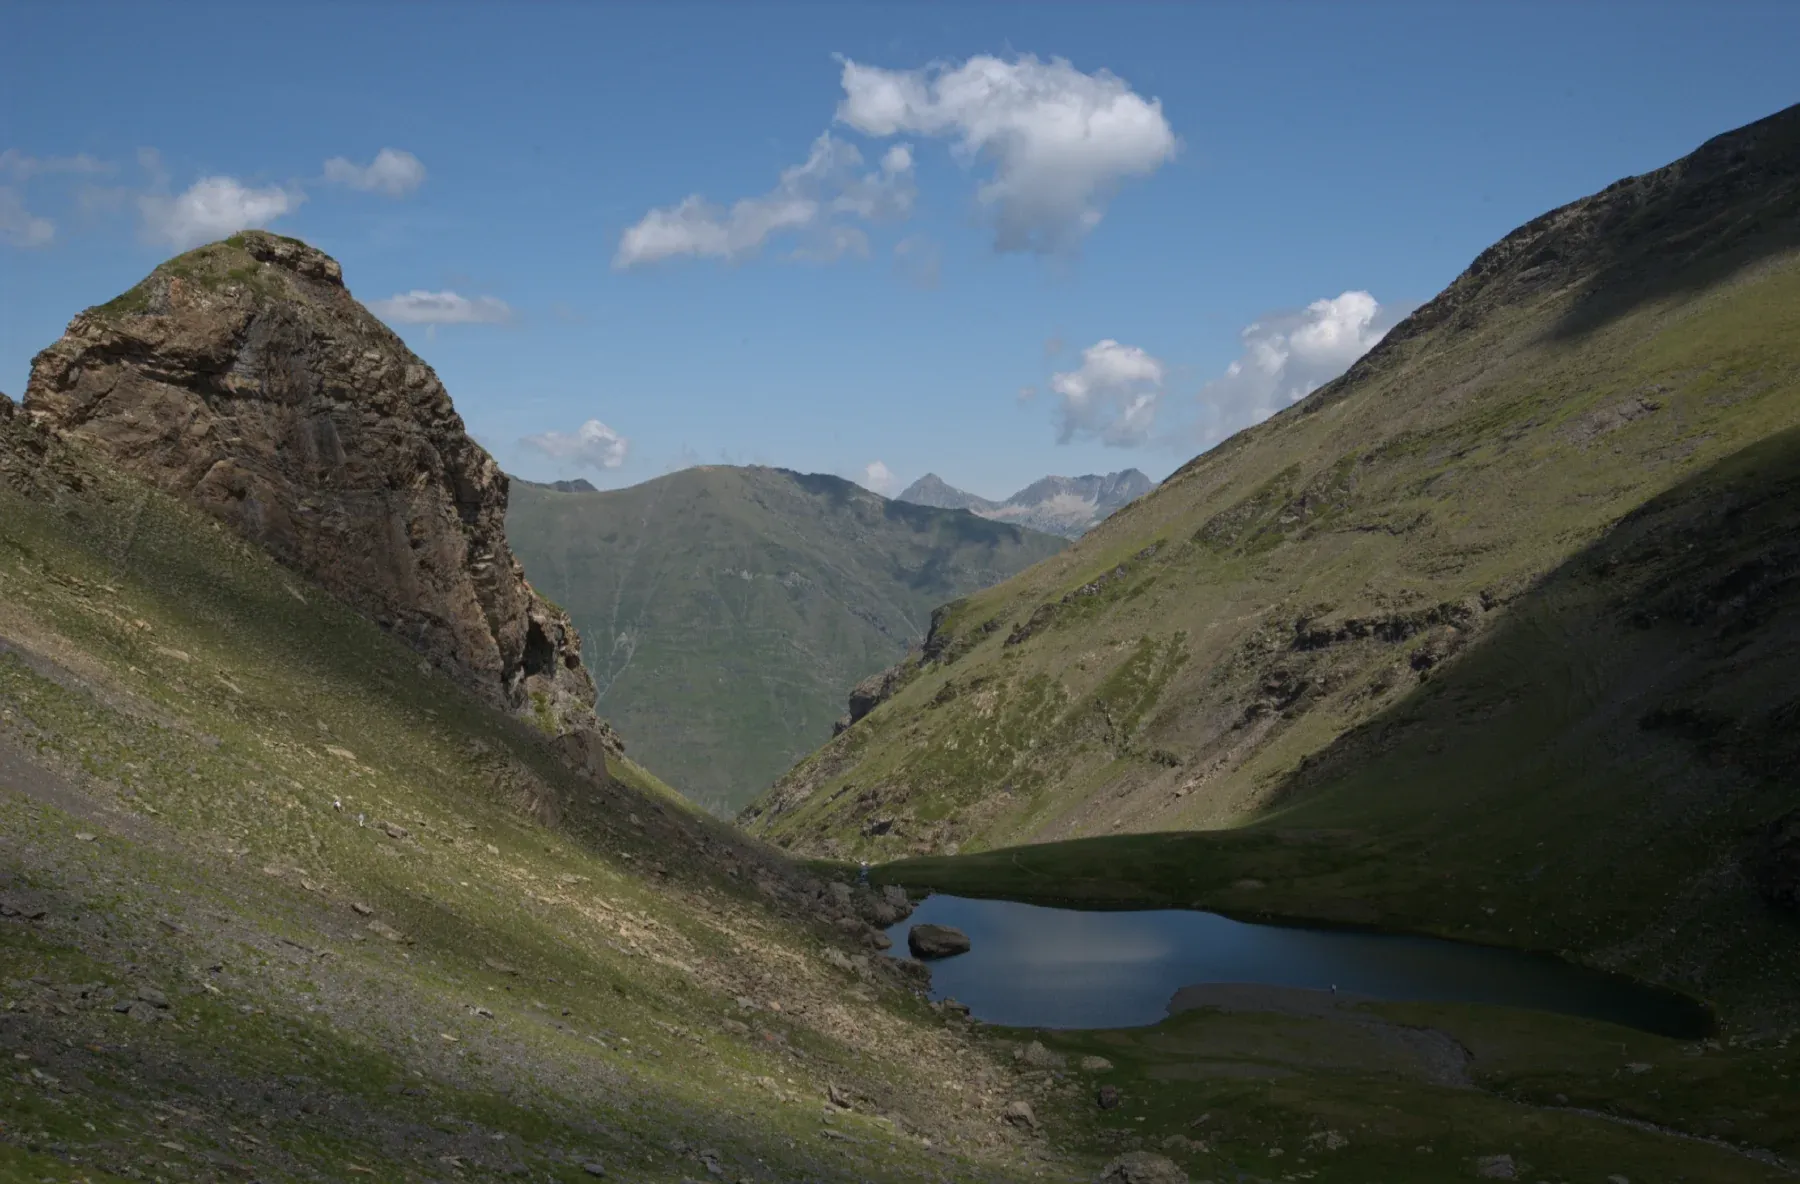
Nikon D1X · NEF CC0, raw.pixls.us Sky (linear): Exposure −0.45 · Highlights −35 · Dehaze +20 · Saturation +15 · Rock (brush): Exposure +0.35 · Clarity +20
Radial gradient
Nikon Z 5 · NEF CC0, raw.pixls.us Inverted radial: Exposure −0.45 · Saturation −10
A radial gradient is an ellipse drawn as a dashed outline. The mask is at full strength in the inner half of the ellipse and fades across the outline, reaching nothing at about one and a half times its size, so the effect reaches a little beyond the dashed line. It has three handles:
- the centre handle moves the whole ellipse;
- the handle on the right edge sets the width;
- the handle on the bottom edge sets the height.
Press Inv to affect the outside instead, for a custom vignette that centres on your subject rather than on the frame.
Brush
Nikon D1X · NEF CC0, raw.pixls.us Rock: Exposure +0.35 · Clarity +20
Select a brush mask and drag on the image to paint. A single click without dragging doesn’t paint. The Brush Settings section appears while a brush mask is selected:
| Control | Range | What it does |
|---|---|---|
| Size | 1 to 100 (default 25) | Brush radius; 100 is 15% of the image’s short side |
| Feather | 0 to 100 (default 50) | Soft edge; the dashed inner circle on the cursor shows where the edge starts to fade |
| Flow | 1 to 100 (default 80) | How much each dab adds; painting over an area again builds it up |
Press [ and ] to make the brush smaller or larger in steps of 5. A pressure-sensitive pen varies the flow with pressure.
Click Paint at the top right of Brush Settings to switch to Erase; the cursor then shows ERASE, and strokes remove the mask where you paint. Click again to go back to painting. Each stroke is one undo step.
Paint at a zoom where you can see the edge you are following. Feather around 50 hides most mistakes; for hard edges, lower Feather and zoom in.
Range masks
Range masks select by what the pixels look like rather than where they are. They have no handles on the image: you set them with sliders, with the overlay on. They read the image after your global adjustments, so if you change Exposure in the Basic panel later, the selection shifts with it.
Luminosity range
Canon EOS 750D · CR2 CC0, raw.pixls.us Clouds: luminosity range 62–100 → Highlights −35 · Clarity +20
A luminosity mask selects a band of brightness, on a scale from 0 (black) to 100 (white) as the tones look on screen. Range Min and Range Max set the band; a new mask selects the shadows, 0 to 30. Falloff Lo and Falloff Hi (0 to 100, default 10) soften the lower and upper ends so the mask doesn’t break into blotches. Use it to recover only the brightest clouds, or to open only the deepest shadows.
Color range
Canon EOS 750D · CR2 CC0, raw.pixls.us Blue sky: Hue 215 · Sat 80 · Hue tol 25 · Sat tol 30 · Lum 30–90 → Saturation +20 · Exposure −0.25
A color range mask selects pixels close to a target color:
| Control | Range | What it does |
|---|---|---|
| Hue | 0 to 360 (default 200) | The target hue; the slider track shows the colors |
| Saturation | 0 to 100 (default 50) | The target saturation |
| Hue Tol. | 1 to 180 (default 30) | How far, in degrees of hue, a color may be from the target |
| Sat Tol. | 1 to 100 (default 30) | How far its saturation may be from the target |
| Lum Min, Lum Max | 0 to 100 | Leave out tones darker or brighter than these |
Click Pick next to the Color Range heading, then click the color you want in the photo: Hue and Saturation jump to it, and the pick is one step in the history. The picker averages a small square around the point and reads the photo after your global adjustments, the same colors the mask tests. Clicking a spot too dark to have a hue leaves the picker on for another try; Esc leaves it without picking.
Turn the overlay on to see what the mask caught, then widen the tolerances until the area is covered. Use Lum Min and Lum Max to keep, for example, a dark blue jacket out of a sky mask.
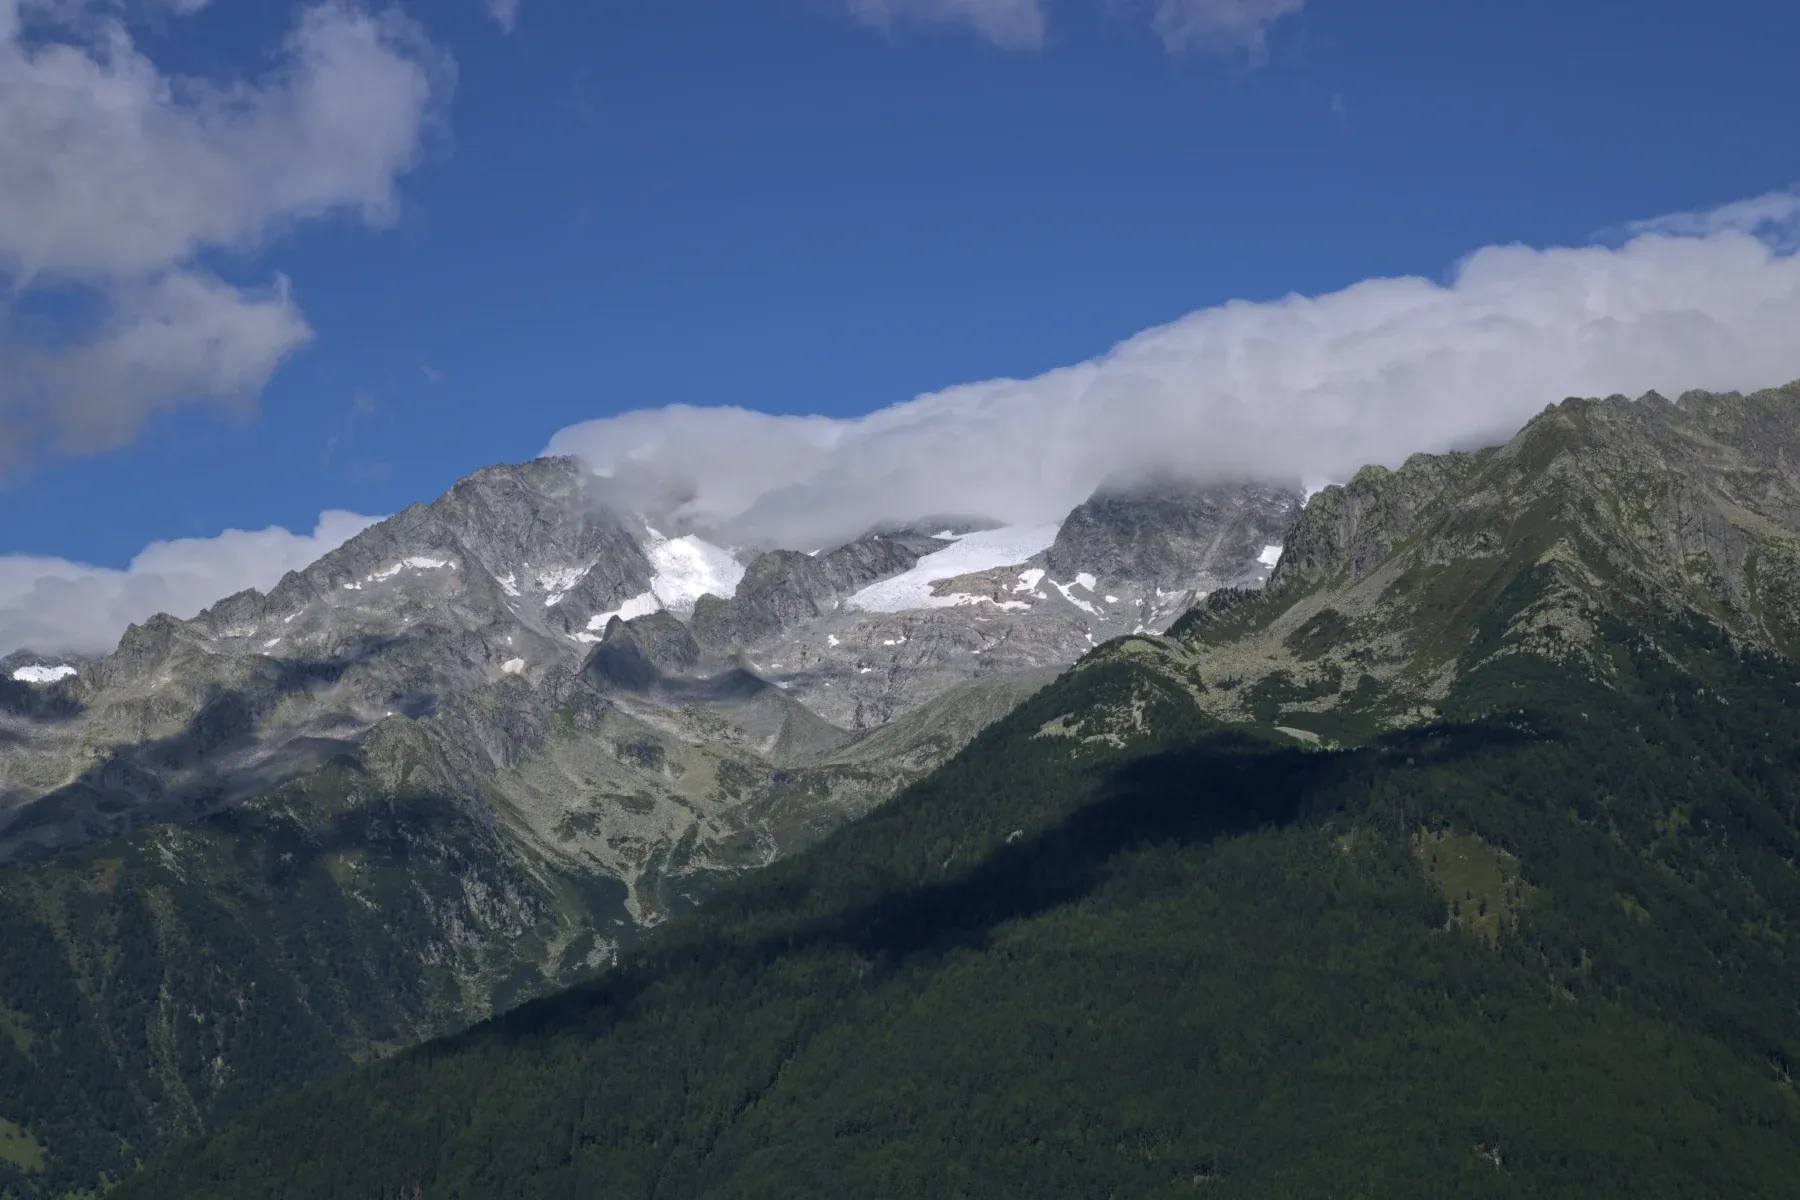
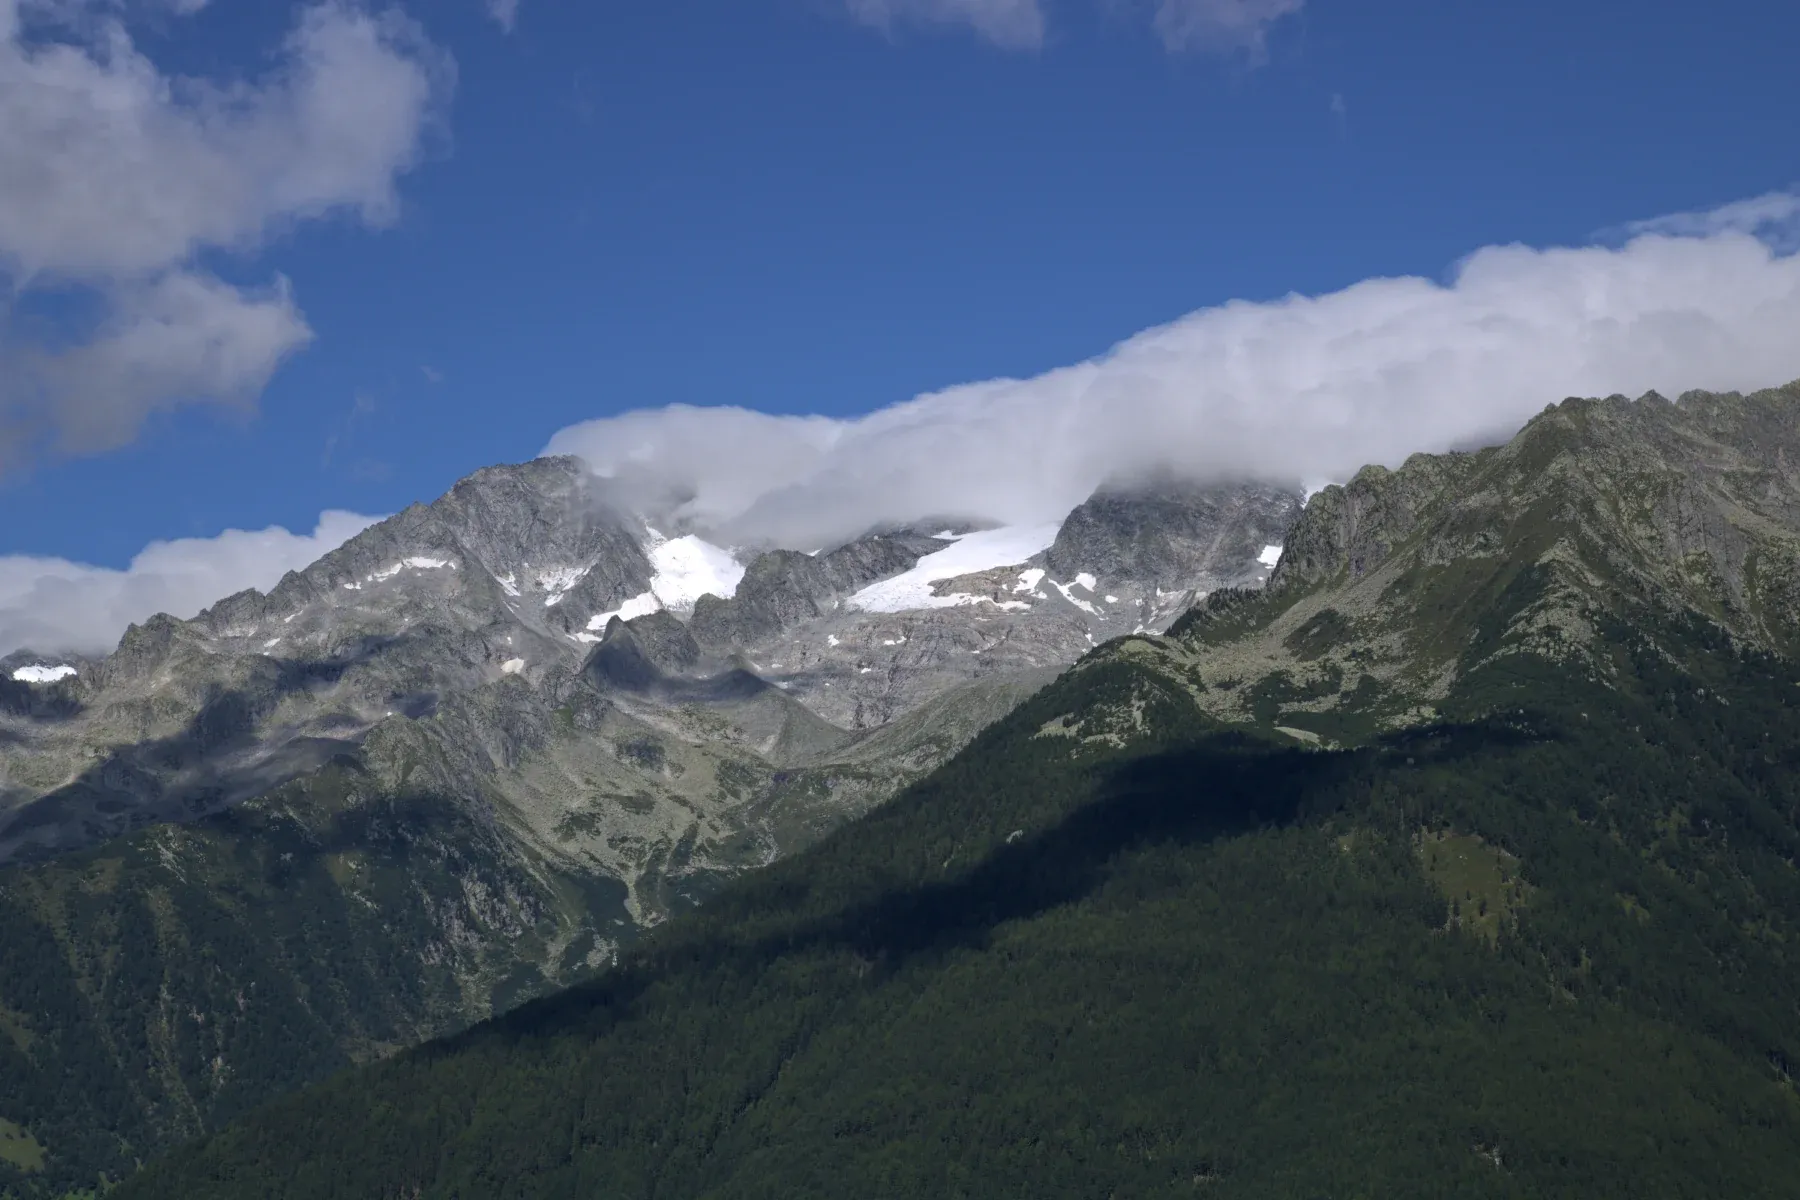
Canon EOS 750D · CR2 CC0, raw.pixls.us Blue sky (color range): Saturation +20 · Exposure −0.25 · Clouds (luminosity 62–100): Highlights −35 · Clarity +20
Masks, crop and backscatter
Gradient handles and brush strokes are tied to the image, not the frame, so cropping or straightening afterwards doesn’t move them. Masks also define search areas for the backscatter finder: paint a brush over a subject to keep its eyes out of the search.
A typical workflow
- Get the whole image right first in the global panels: masks build on it, and range masks read it.
- Press M, add a mask, press O and shape it with the overlay on.
- Press O again, then move the local sliders while watching the photo.
- Toggle On / Off to check the mask helps, and lower its sliders if the edge shows.
Masks are saved with the rest of the edit and travel in settings files; see history and autosave. For all keys, see keyboard shortcuts.